Windows 10 has added so many features and easier ways to manage things; your Recycle Bin is no exception to these upgrades. Today I’m going to show you a few things about the Recycle Bin you may not have known about that will help you better manage your computer.
The easiest way to open your Recycle Bin is to click the shortcut icon on your desktop. This icon will also show that it has items changing depending on the actual state of your computer’s Recycle Bin.

Double-click the Recycle Bin icon to open the Recycle Bin folder and start with me.
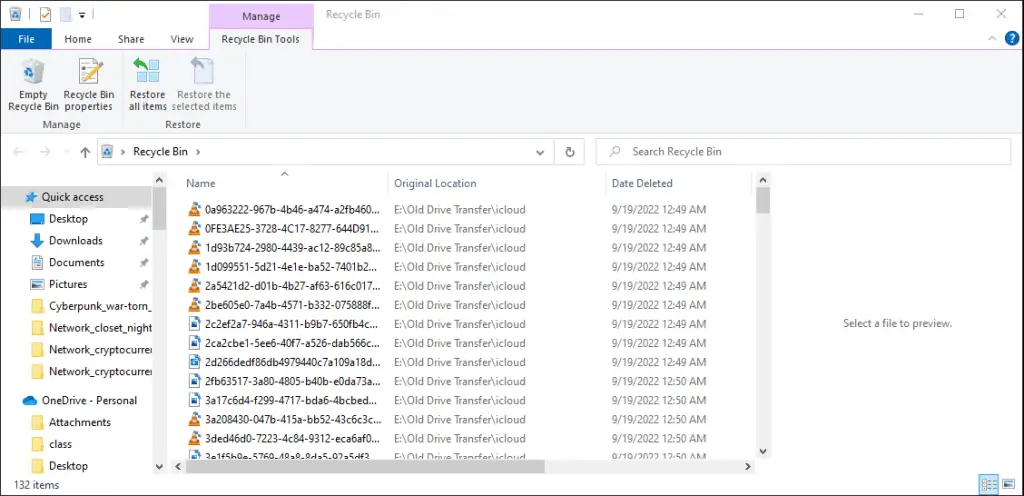
The first thing you might notice is the new ribbon tool “Recycle Bin Tools” this has seemingly simple options that make working with the Recycle Bin in Windows 10 much more straightforward. From Left to Right, you will see
- Empty Recycle Bin – This button does exactly what it says, allowing you to empty the entire Recycle Bin in one click.
- Recycle Bin properties – This button allows you to set a max size in MB per drive, turn on or off delete confirmation messages, or skip the Recycle Bin and permanently delete files.
- Restore all items – Single click to restore everything in the Recycle Bin
- Restore the selected items – when you click on any items in the display window, you can use this button to put the desired items back to their original location before deleting them
Next, some things to notice in the main display window you will see helpful columns of information. The most important are the item’s Name, the Original Location, and the Date Deleted. You can right-click the header to reveal more options for columns, but the defaults will get you pretty far.
Last, right-clicking items in here has a bit of a different effect from your standard Explorer actions as well, only giving you the option to Restore, Cut, Delete, and Properties. The Properties option might be the most interesting here as it provides us with a view of the history of the deleted item. Helping us figure out when someone deleted it and the original file creation date can be beneficial when you are unsure if you want to restore something or let it be deleted.
Now that you know a bit more about the Recycle Bin, I’m going to show you a few other places you can control some settings for the Recycle Bin, adding options to delete the items at different time intervals or when your space reaches a certain threshold. Keep reading as I take you down the rabbit hole of Advanced Recycle Bin usage.
Automating the Recycle Bin
If managing the mundane day-to-day details is not your thing, then you can follow this short guide to automate the management of your Recycle Bin. We will use Storage Sense to delete your Recycle Bin once the items have been in there for more than a set amount of time. It will let you pick from Never, 1 day, 14 days, 30 days, and 60 days. I have mine set to 30 days.
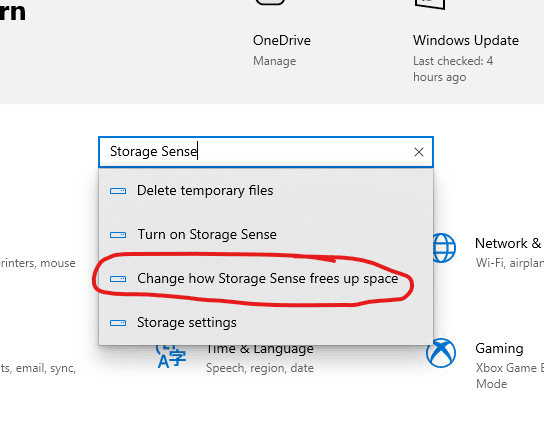
To do this, open the Settings App and search for Storage Sense. In the options menu pops up, you will see “Change ho Storage Sense frees up space.”
On the next screen, you will see options for selecting the number of days before deleting the items in the Recycle Bin.
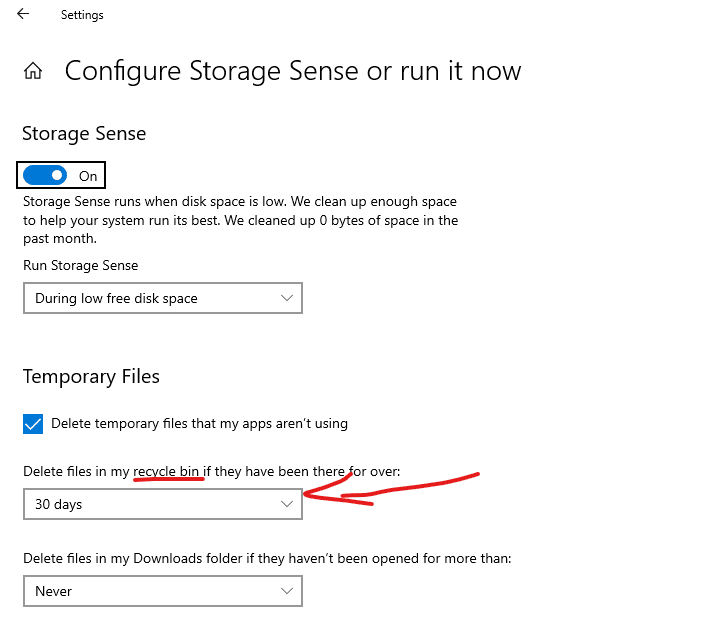
Choose what makes the most sense to you, and once you have made the selection, you can close the window.
Another way to automate the Recycle Bin is to set the option for how much space you will allow on any given drive to be used for the Recycle Bin. That way, when the Bin gets too full, the computer will delete items instead of saved. I recommend not setting this setting until I have tested it further to report if things in the Bin get deleted or the items you are currently deleting.
But if you are brave and want to try it out before verification, you can get there by opening the Recycle Bin up and then clicking the Properties button in the Ribbon at the top.
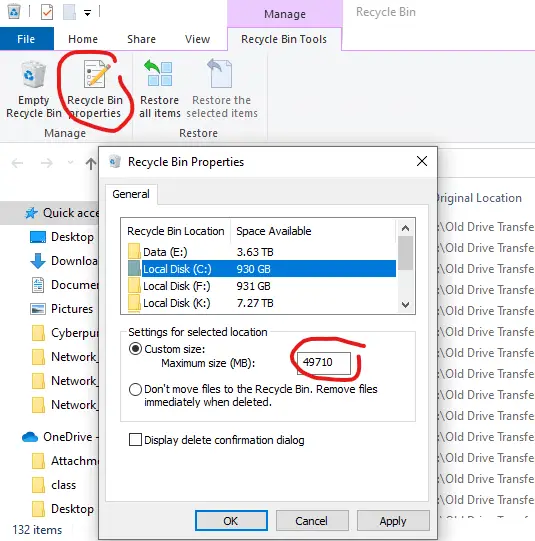
From there, you can adjust the Maximum size in MB to whatever you feel is appropriate for your drive size.
Now that we have learned more about the Recycle Bin than you might have ever wanted let me show you a few different ways to access the Recycle Bin in case your shortcut gets deleted or you are just curious.
5 Different Ways to Open the Recycle Bin
Sometimes you want to go a different path. Other times, you accidentally delete all the shortcuts on your desktop (or can’t find the shortcut amount the clutter). Here I’m going to show you several different ways to open the Recycle Bin so you never have to feel left out when you need to reaccess the Recycle Bin.
Desktop Shortcut
I have to put this one here since it is the primary way nearly anyone will access the Recycle Bin. Click the desktop shortcut!
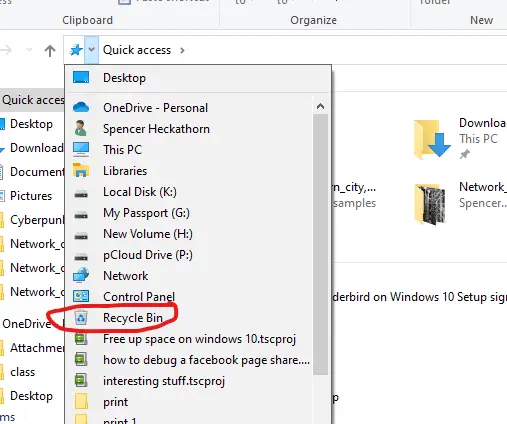
File Explorer Dropdown Selection
Windows is a GUI-first system; you can access many essential things from this dropdown. Recycle Bin is one of the valuable things you will find here. Just click the arrow on the left of the address bar, and you will see Recycle Bin in the list of places you can access.
Search for Recycle Bin
Using search in the start menu, search bar, or Cortana, you can type in Recycle Bin and bring up a shortcut to access the Recycle Bin.
Using the Run Window
Click Win+R to open the Run Window and type in
shell:RecycleBinFolder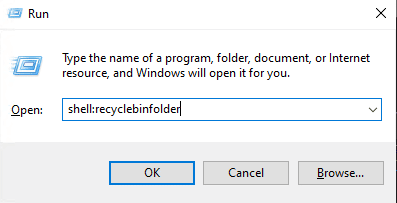
Hit enter and the folder will open for you.
Command Line
Open a command prompt and type in the command
start shell:RecycleBinFolderHit enter and the folder will open for you.
Thanks for checking out my article. I plan to expand on this one, but if you have any methods I missed, please let me know by leaving a comment below!
That completes the look at the Windows 10 Recycle Bin. I hope it was helpful. If you found this article helpful, I will only know if you leave me a comment, so please let me know if you would like me to make more articles like this one.