Recently I’ve been trying out different Office 365 tools and features. My most recent venture has me working with Planner. I’ve put this article together to explain and show how useful it can be. This is similar to my all-time favorite, Trello but comes as part of the Office 365 subscription, so you get full integration with other O365 services and apps you are already using. Lastly, it has nice integration with external users, which will be in a separate article.
As a small business owner or manager, you know how important it is to stay organized and on track with your projects. And when it comes to project management tools, Microsoft Planner is a great choice.
With Planner, you can easily create tasks, assign them to team members, set due dates, and track progress. Plus, its built-in calendar view makes it easy to see what tasks are coming up and when they’re due. And if you’re working with a team, the built-in chat and commenting features make it easy to collaborate and share information.
Follow along as I walk you through setting up a Planner Plan and show you some of the features.
Setting Up A New Plan
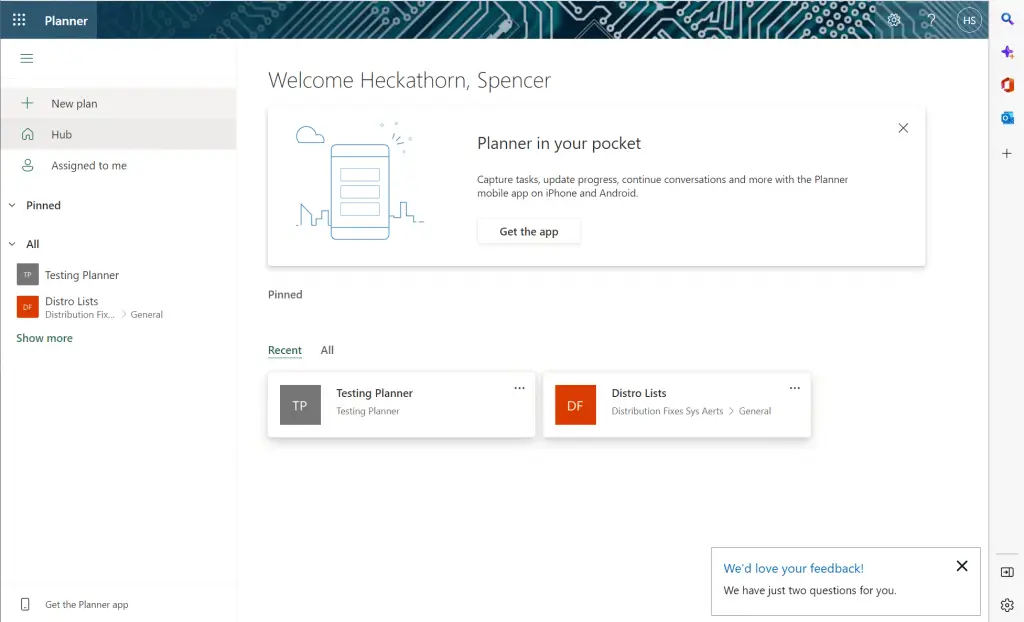
New plans start in the Planner app found at https://tasks.office.com/ by clicking the + next to “New Plan”. However, before you start you may want to have a group set up to select on project creation. This optional step will make things easier if you need to have other people on your Planner project. Article explaining setting up O365 Groups.
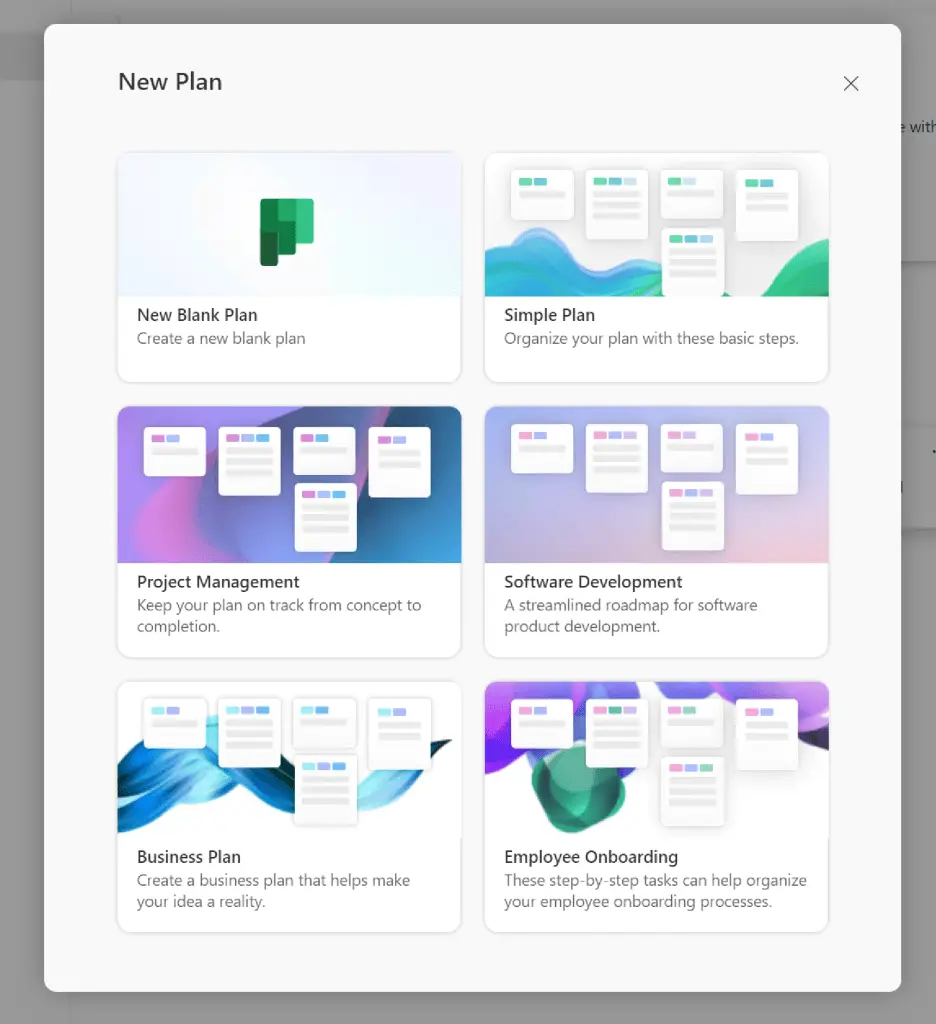
When I first opened the Planner, it might not have finished setting up because I didn’t have any templates to choose from; however, after I set up a few plans to test things, I now get 6 options New Blan Plan, Simple Plan, Project Management, Software Development, Business Plan, and Employee Onboarding.
One nice thing about apps like Planner and Trello is the ability to work fully through a process and approach before implementation. It is a visual way to plan and manage.
For this guide, I’m selecting Project Management. I’m also leaving the “Add to existing group (optional)” blank so we can add a group or members later.
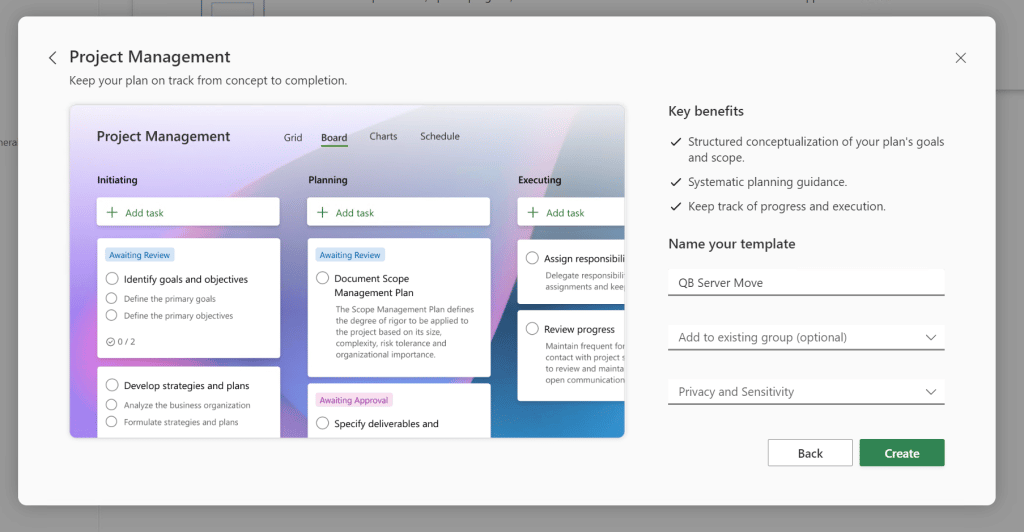
MS will setup a sample project that serves as a guide to the things you can do.
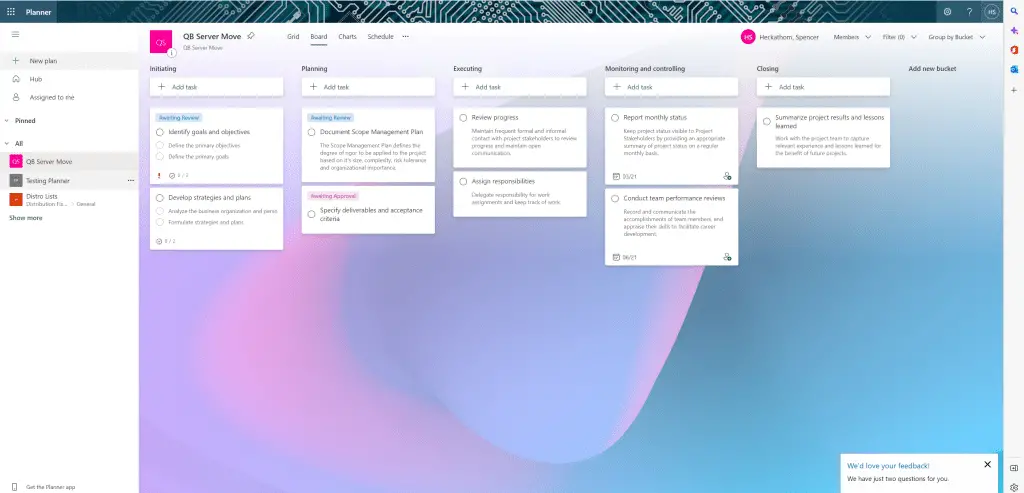
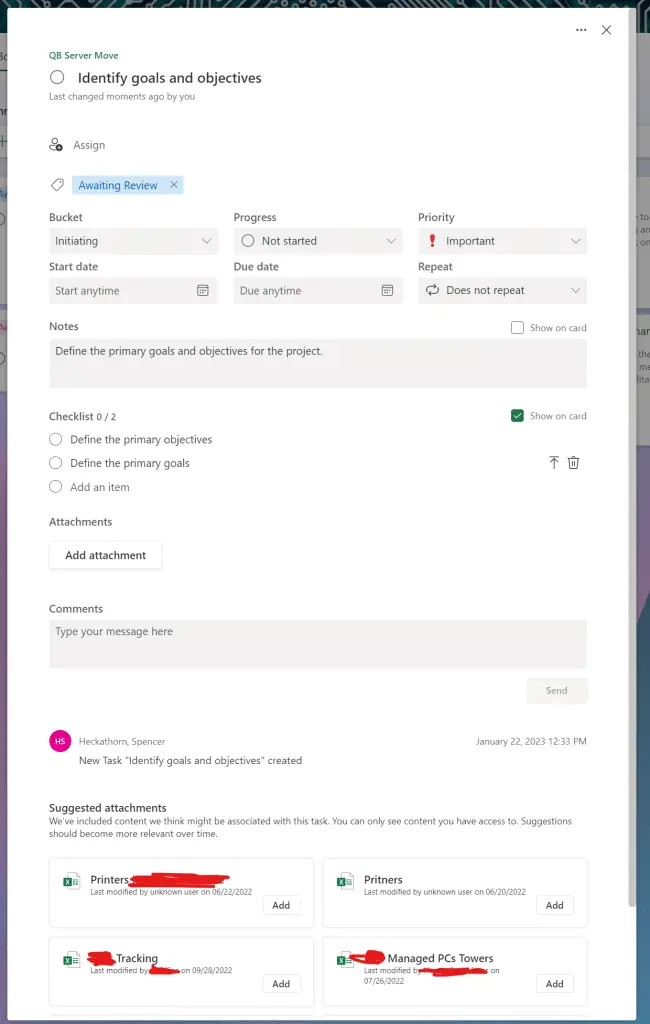
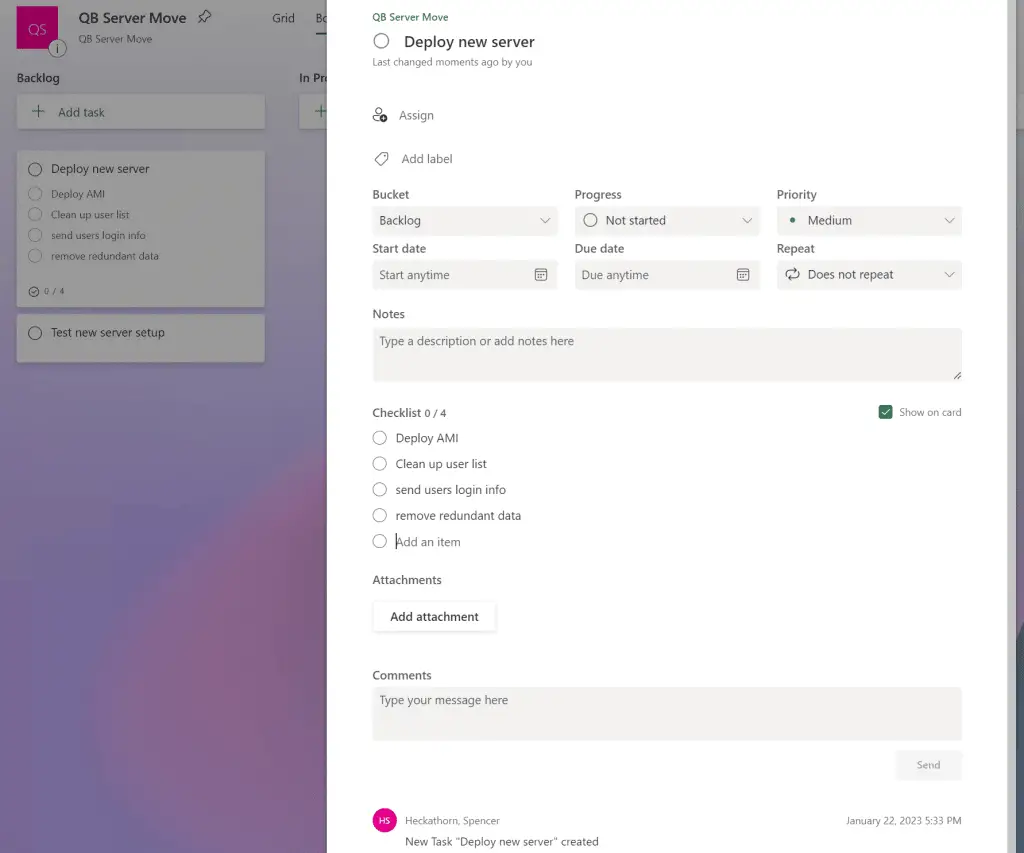
Clicking on a card will give you the overall task to complete and you can create checklists, add a description, add attachments, add documents, and set start times and due dates.
Creating Tasks and Buckets
Creating tasks and buckets in Microsoft Planner is a key component of making a a good project plan. Tasks are the individual items to complete as part of your project and buckets are the categories or stages which these tasks are grouped.
Making a task is straightforward. From the project homepage youc an click on the “New task” button and create the task. Enter the task name and any other information that you will need for the task. You can update the any time.
Buckets are used to organize your tasks by category or stage in the project. For example, you might create a bucetk for “To-Do” tasks, one for “In Progress”, and one for “Completed” tasks. Once created you can drag and drop tasks from one bucket to another or select the bucket a task belongs to from within the card of the task.
Taking some time to think about your buckets will help you organize your projects better and be more effective as you work through the project. Here are some lists of buckets and project types that you may find helpful as starting points.
| Ind. Type | ||||||
| Marketing | Research & Planning | Design | Implementation | Review/Approval | In Progress | Complete |
| Software Development | Planning | Development | Testing | Review | Deployment | Complete |
| Event Planning | Planning | Logistics | Execution | Review | On-Site | Complete |
| Construction | Planning & Design | Construction | Inspection | Complete | ||
| Book Writing | Planning & Research | Writing | Editing | Proofreading | Review | Publish |
| General | Backlog | To-Do | In Progress | Review | Done | |
| Additional ideas | On Hold | Blocked | Deployed |
Many of these statuses are based on a kanban based planning system.
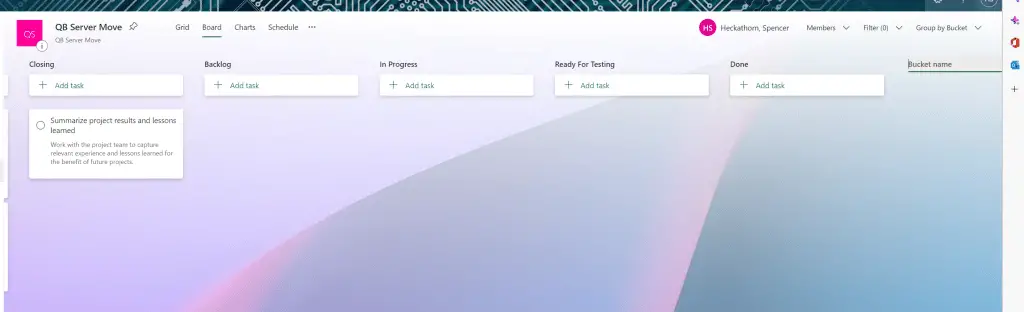
For the example project I’m going to create the following status buckets:
- Backlog
- In Progress
- Ready For Testing
- Done
To do this I will start by selecting the “Add new bucket” text on the far right of the screen past the sample data provided by the project type I selected. Once I do so it will change to “Bucket name” and I can name each bucket.
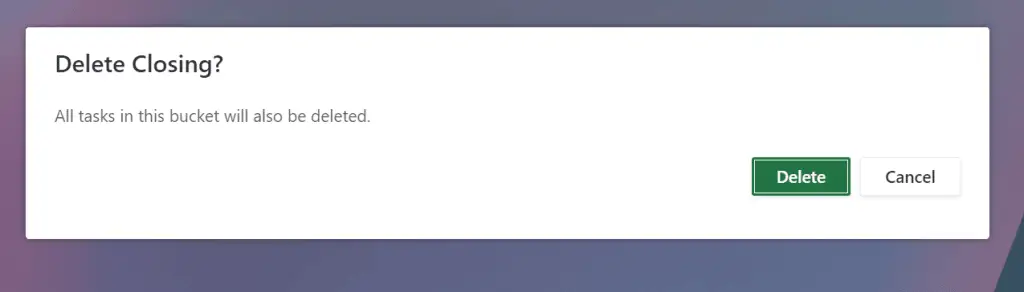
Next I’m going to remove the buckets the project started with. Click the three dots next to each bucket and then select delete for each.
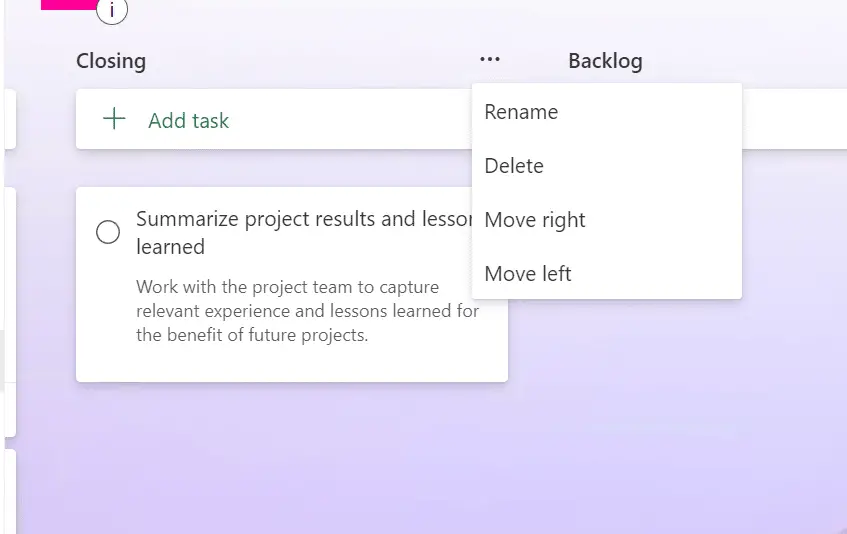
This deletes all the tasks in the bucket as well, but this ok for our example.
Below each bucket is a create new task button. Add the name and other information such as checklists etc.
Using Calendar View
Adding dates to tasks allows us to view the project on Calendar view.
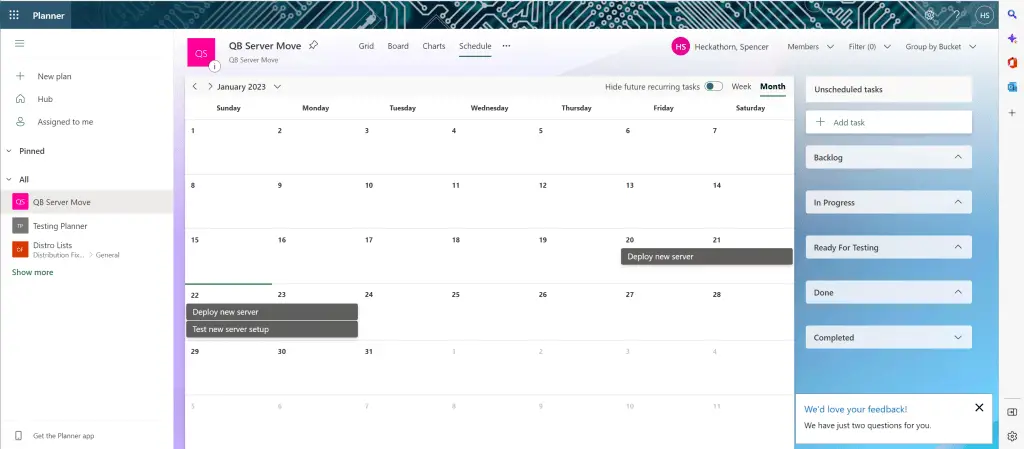
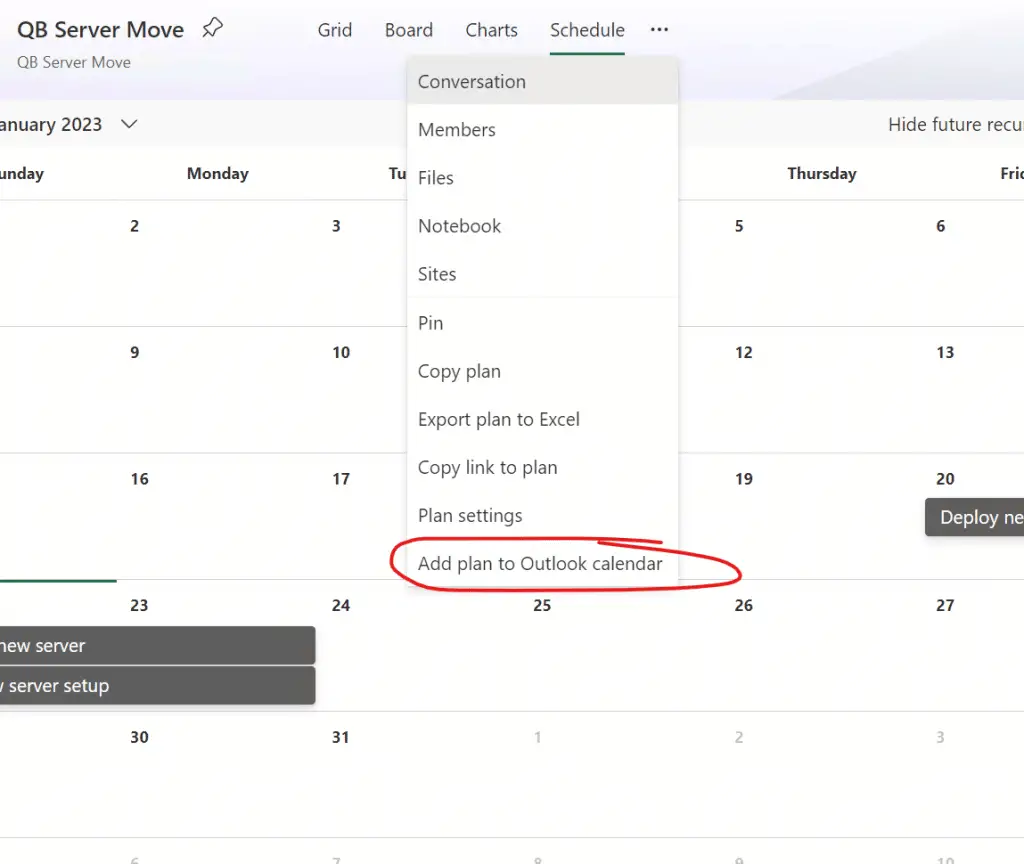
From here we get an option to add the plan to Outlook by clicking the three dots after the menu and then selecting “Add plan to Outlook calendar.”
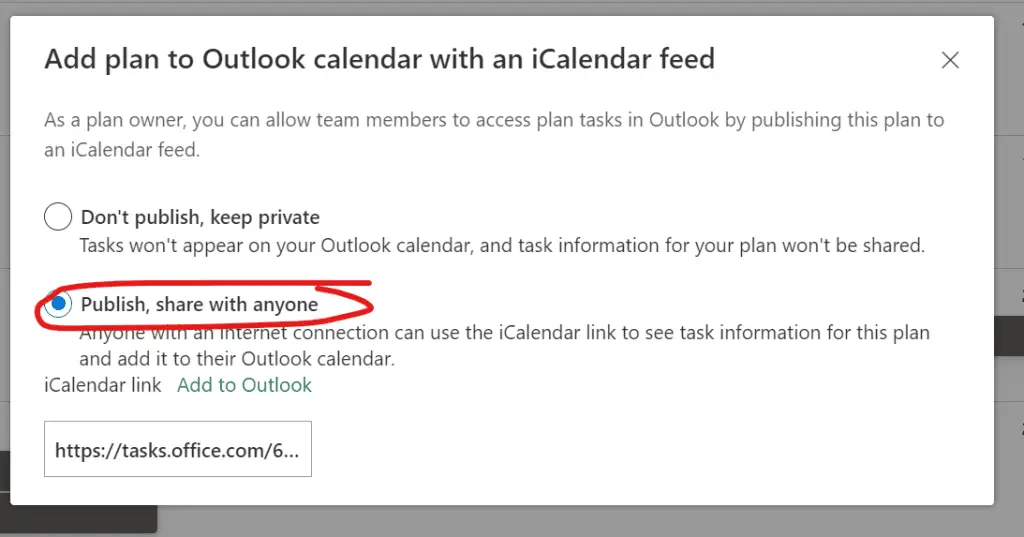
From there you will be given a calendar link to share to your Outlook after you select to publish the Calendar.
Tracking Progress
Tracking progress closely is very important for any project management. Accurate monitoring allows you to identify when the project is falling behind schedule and helps you take corrective action early on in the process to avoid delays and budget overruns.
Planner makes tracking this progress very easy with the built-in analytics and reporting tools. One of the first useful features is the “Group by Bucket” feature in the top right of the window. Here you can select to organize the view by bucket, assigned to, progress, due date, labels, or priority.
The charts page will allow you to view items vs completion. If you want to build different types of graphs youc an export the entire project to excel.
Overall Planner will provide you with many tools you need to effectively track and execute projects.
Collaborating with Team Members
One thing we have not covered so far is adding people to your project. You can easily add people in your organization to the project allowing them to see the tasks of the project including things assigned to them.
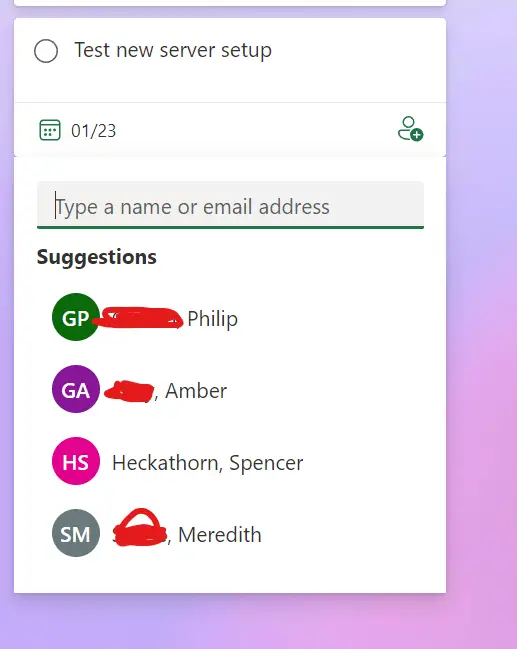
Start by clicking the “Members” dropdown in the top right of the page and typing the names of people you would like to add. Click each as they appear.
Next you can assign people to tasks by clicking the icon that shows a person with a plus. Next, click on each person’s name you would like to assign to the task.
One nice feature is you can click on the persons avatar to quickly see the tasks they are assigned.
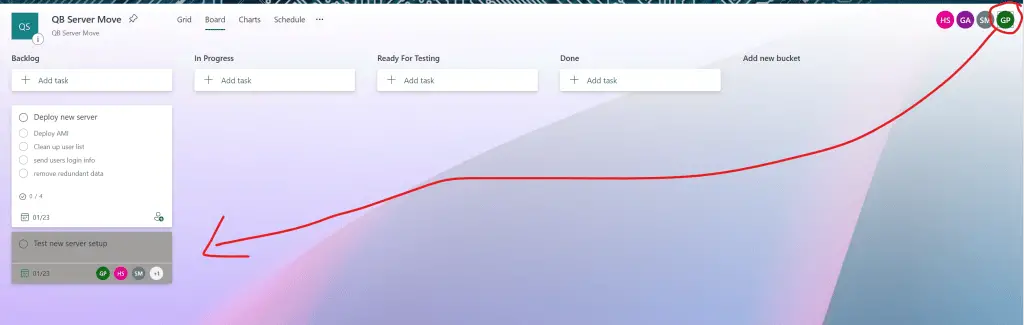
It highlights all their tasks in gray.
I will have a new tutorial on how to add people outside of your organization.
Hopefully I’ve shown you enough so that you can see how helpful Planner is in general project management. If you give it a try let me know in the comments how it worked out for you!